Crankbait Reboot
June 5, 2018

Crankbait Reboot
STL files for this design are available on Printables and can be found HERE.
This is a reboot of a crankbait I made probably 25 years ago I’m just doing a modernized version of it using CAD and 3D printing.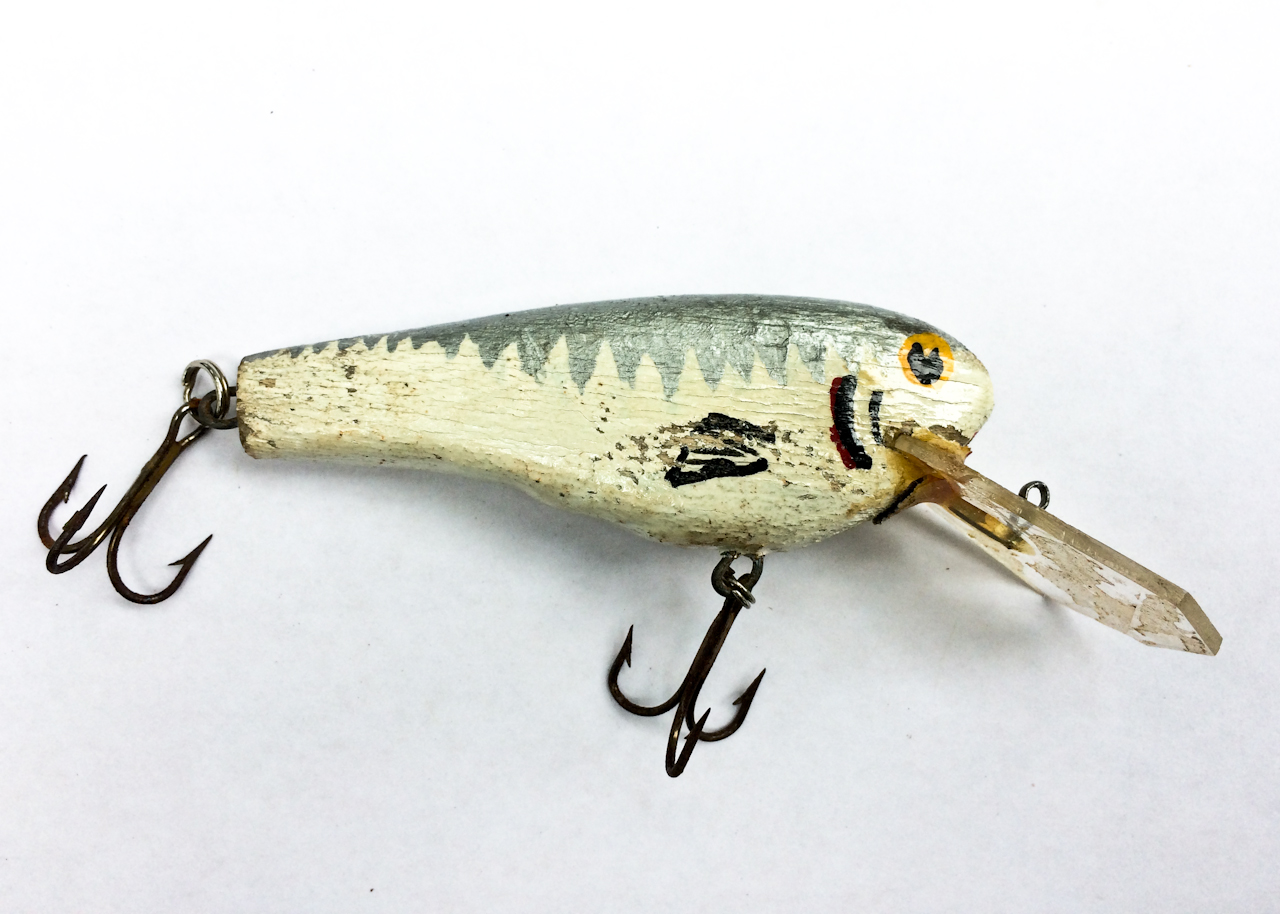
The original crankbait was carved from balsa wood, the lip was a cut from a piece of plexiglass, and I used cotter pins for the hook and tie on points. The lure was just hand painted and sealed with some 5 minute epoxy. It’s been in my tackle box for all these years and I still fish with it now and then. I caught some fish with in 2017 but noticed it was starting to fall apart and recently the lip came unglued so it was time for a redo.

I redesigned the lure in Onshape from pictures of the original. I made two versions… one has a printed attached lip and the other one would use a plexiglass lip like the original which would then be glued on later.
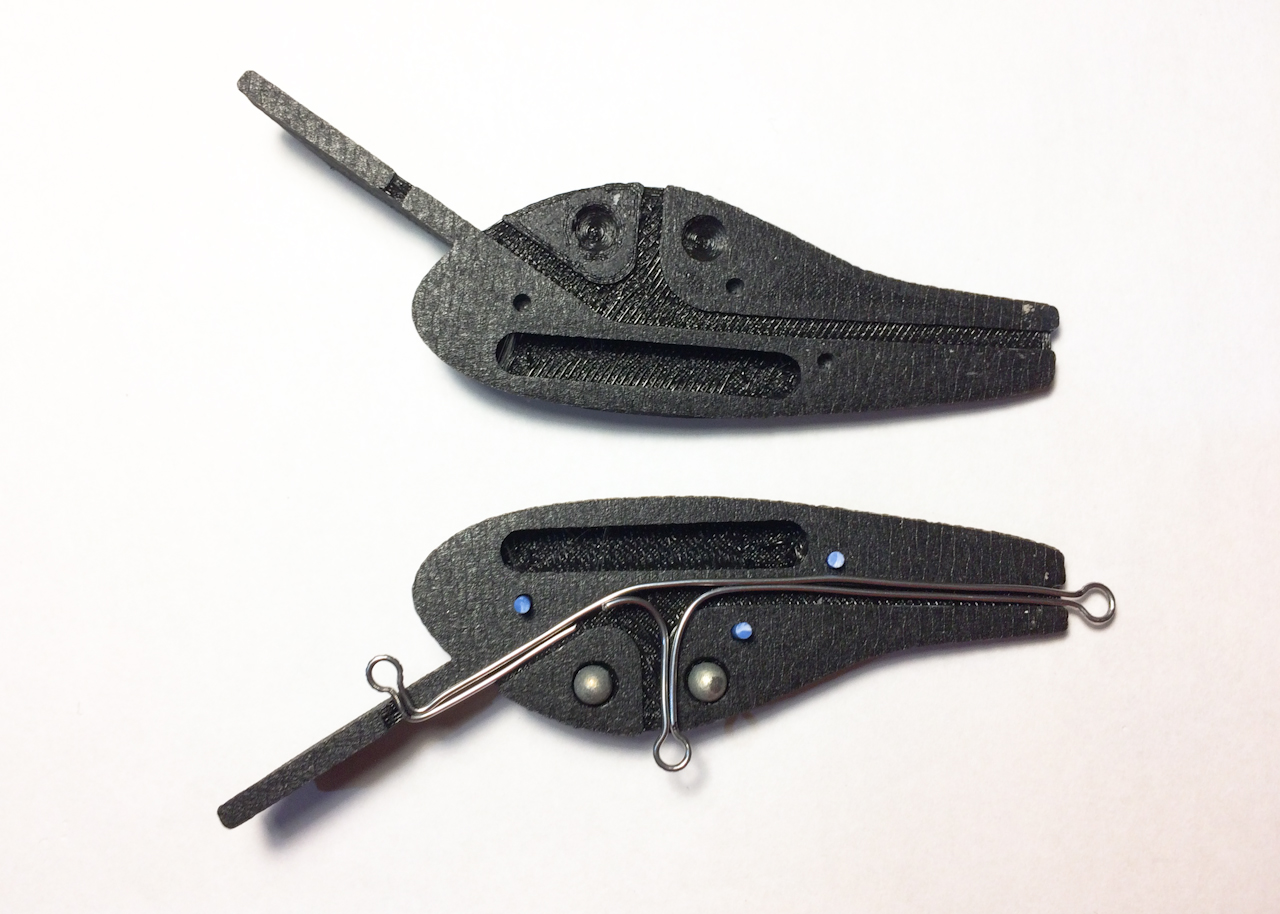
For starters I went with the printed lip version and it was assembled in two halves just like all of my printed lures.

Here the two halves have been super glued together and the lure is ready for finish work.

At this point I’ve only done a quick sanding and sprayed it with some primer. (I no longer waste time painting them until I fully test the design in the water.) Testing went well, the lure has some good amount or wobble action to it. It does sinks a little funny (tail first) if you stop the retrieve though. I printed this on at 80% infill so it’s heavy… on the next one I’ll try less infill to change the buoyancy and see if that helps with the action while paused.
Time for Paint

For paint on this I’m going real simple (just like the original) I start with a base coat of plain white.

Next I spray on some Pearl White. (It looks a little grey because of the grey primer coat but that’s ok because I want it too look like a minnow anyway.)

I made up a printed stencil to add the strips.

I used some metallic silver for the stripes…

…but I didn’t think it was dark enough though so I hit it with a little pearl black too. I also gave a fins a little spritz too.

Next I hit the back strap with pearl black too to tie everything together. (I did get some spitting from the airbrush though. I probably should have thinned the pearl black a bit.)

I then hit the front mouth area with a little red.

Finally I add a few details like the eyes and gills with a brush.
The finished lure after sealing…. ready to catch some lunkers.

And of course the Reboot version vs the Original.

9/8/19 – Finally got around to using it and…. well it worked.
![]()
All Information, Pictures, and Material is copyright © 2018 by Stephen Thone and may not be used for any personal or commercial purposes without the consent of the author. All rights reserved. The Author makes no guarantees or warranties as to the accuracy or completeness of, or results to be obtained from accessing and using the Information herein.
2 Replies to “Crankbait Reboot”
Hello would anybody be able to make stencils for after fishing lures because I paint lures and making stencils all the time can a 3d print
make stencels of any shape or mold fishing lures with easy
You can make 3d printed stencils (see some examples on this page https://www.theneverendingprojectslist.com/fishingprojects/crankbait/) but you need to be able to first design the lure in CAD. Even if it’s a store bought lure you can copy the design by importing pictures of it into a CAD program and then duplicating it from there. Once you have the design of the lure making a stencil is pretty easy. Overall it’s going to depend on if you learn CAD though.