Two Piece Open Pour Swimbait Mold
April 2, 2020
Two Piece Open Pour Swimbait Mold
STL’s for the 4″ lure are available for purchase from Cults3d.com
This is a two piece open pour Swimbait mold I have been working on. It’s a work in progress right now and the design is subject to change along the way.

The design started out with a simple sketch based off a weighted hook I found locally and the overall length is about 4 inches.

The basic CAD was done in Fusion 360’s sculpt environment.
I ended up printing a few masters along the way to be able to physically see what needed to be changed.

The biggest changed needed was to thicken up the tail section. (It still might be a little thin.)

The first actual printed mold was done in one piece but being a thick bait it was a little hard to remove. These are a few of the first test pours done using just remelt plastic.

I went back and added a little more detail and pectoral fins to the design.

It was at this point I also went with a two piece mold.

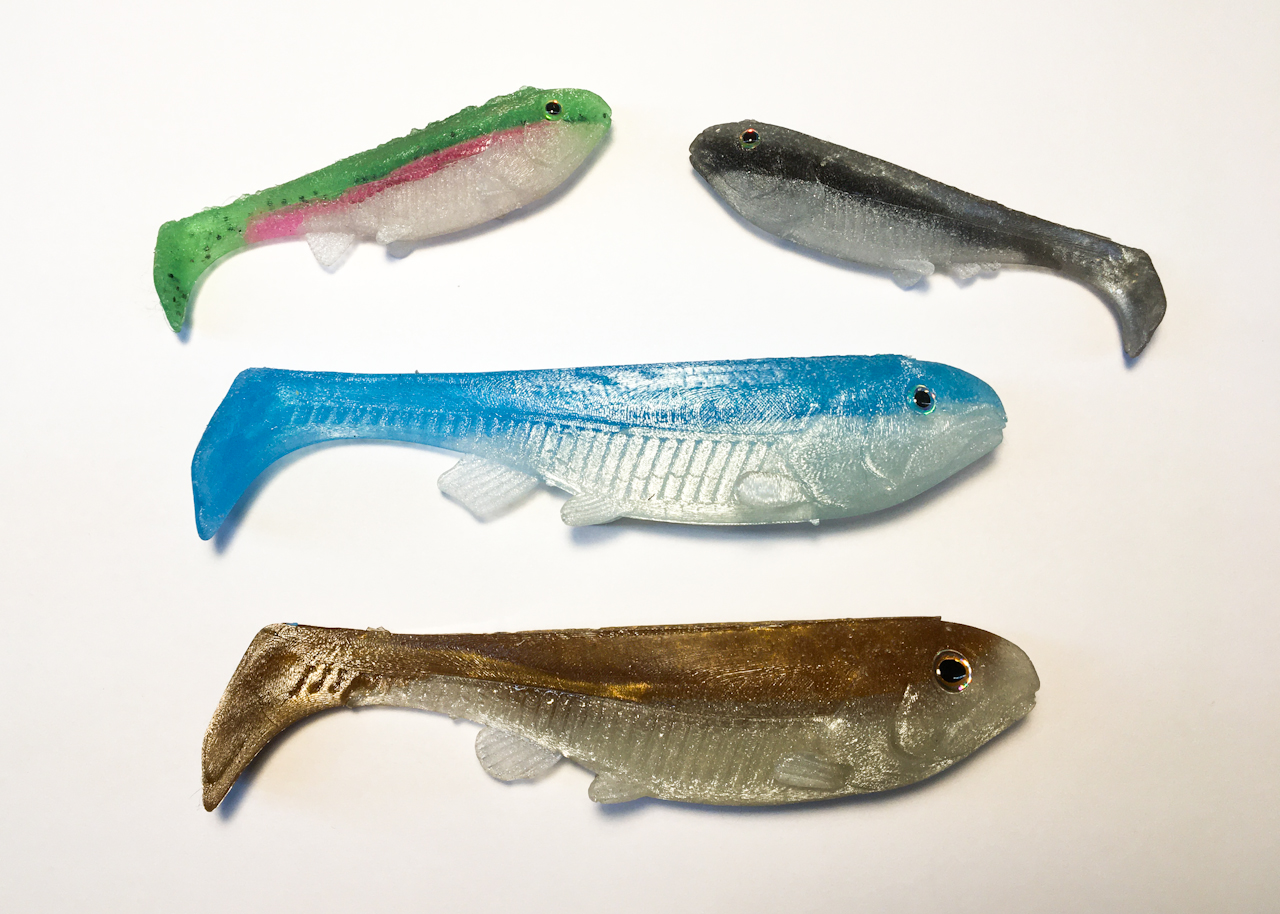
Here a few pour test pours trying with some actual color patterns. The bottom of is the only one with pectoral fins but they didn’t come out that well.

I better shot of it rigged.

In water action action shot.

Slow-mo top view action.

The next thing I did was scale up the design to a 6″ sized bait to see what it would look like larger and to see if the fins would work.

The pectoral fins came out pretty well on the big ones. (I’m not sure if they are going to affect the action though.)

Here are the first two pours compared to the 4″ one. (The top one is a little dirty from testing and forgetting it in the bed of my truck for a few days.)

The mold design was to thin at the top so the plastisol started to melt the top of the mold a bit.

I went back and added a bit to the top of the mold as well as adding some venting to help with the fins.

I also had to use a piece of thin metal for the hook slot because the plastic one melted.

Here’s a quick shad pattern (minus the dot) that I tried to do with the new mold.

I also made the details a little more pronounced on this mold.

The pectoral fins came out a little small so I might have to work out those issues while pouring. Overall I’m getting close to a working design I think but more testing is required.

4/25/20 – First fish on one of the 4″ prototypes. (first fish of the year too.)

2/22/21 – After many request for this I went back and updated the design a bit before releasing the files. I had to lay the pectoral fins flat against the body as I just couldn’t get them to pour at this size and I changed to .25″ eyes.

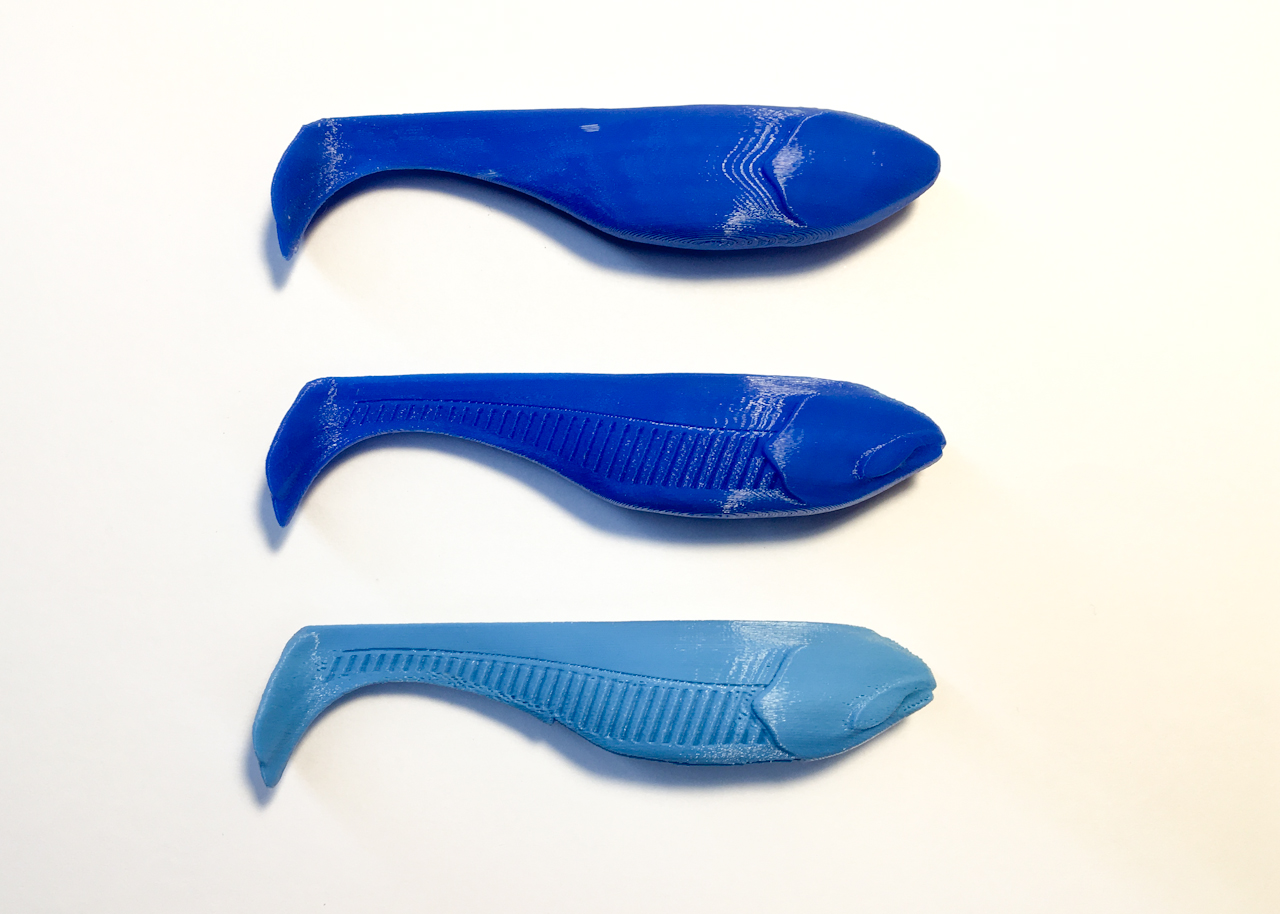
I designed two version because I was afraid of the thin top section of the mold melting or warping over time. Version one has a thin top which is easier to pour because you can use the sharper edge to remove any over pour but just running your thumb over it. (The first mold test print did come out a bit rough as I was using a new filament I haven’t configured yet.)

While not perfect this was the first test pour. The baits end up sticking to the mold slightly because of the details print a little rough but they still come out OK and the finish baits look good I think.

Version 2 has a thicker reinforced top so it won’t melt but it’s harder to pour because you have to stop pouring before it over pours and you get a flat top.

While the flat top is not the end of the world this is what an intentional over pour bait looks like.

Here are the two versions side by side. V1 on the Left and V2 on the Right

I did add vent holes for the little rear fins to hopefully help them pour better so the channels on the outside are for when the mold is clamped together.

I use a wood working vise on small molds so I wanted to make sure the vents stayed open when the mold is clamped.

These mold are small so its a little hard to pour and better suited to single colors but I did try a few multi color baits. The test baits shown at the top of this page are better looking but do tend to cold crack because you can not pre-heat these molds like you would with an aluminum mold. The bait shown above the two colors were poured at the same time to try and eliminate the cold cranking but the colors do blend together and come out a little less desirable.

Another way you can color the baits is to dust (or paint) the mold with mica powders with a brush before pouring in the plastisol. I’m not the best at the technique as you can see above and it’s a little harder to do on a 3D printed mold compared to say a smooth aluminum mold a but it works out ok. I usually print a separate mold if I’m going to use the dusting method because it is harder to clean the dust off the printed molds after using this method.
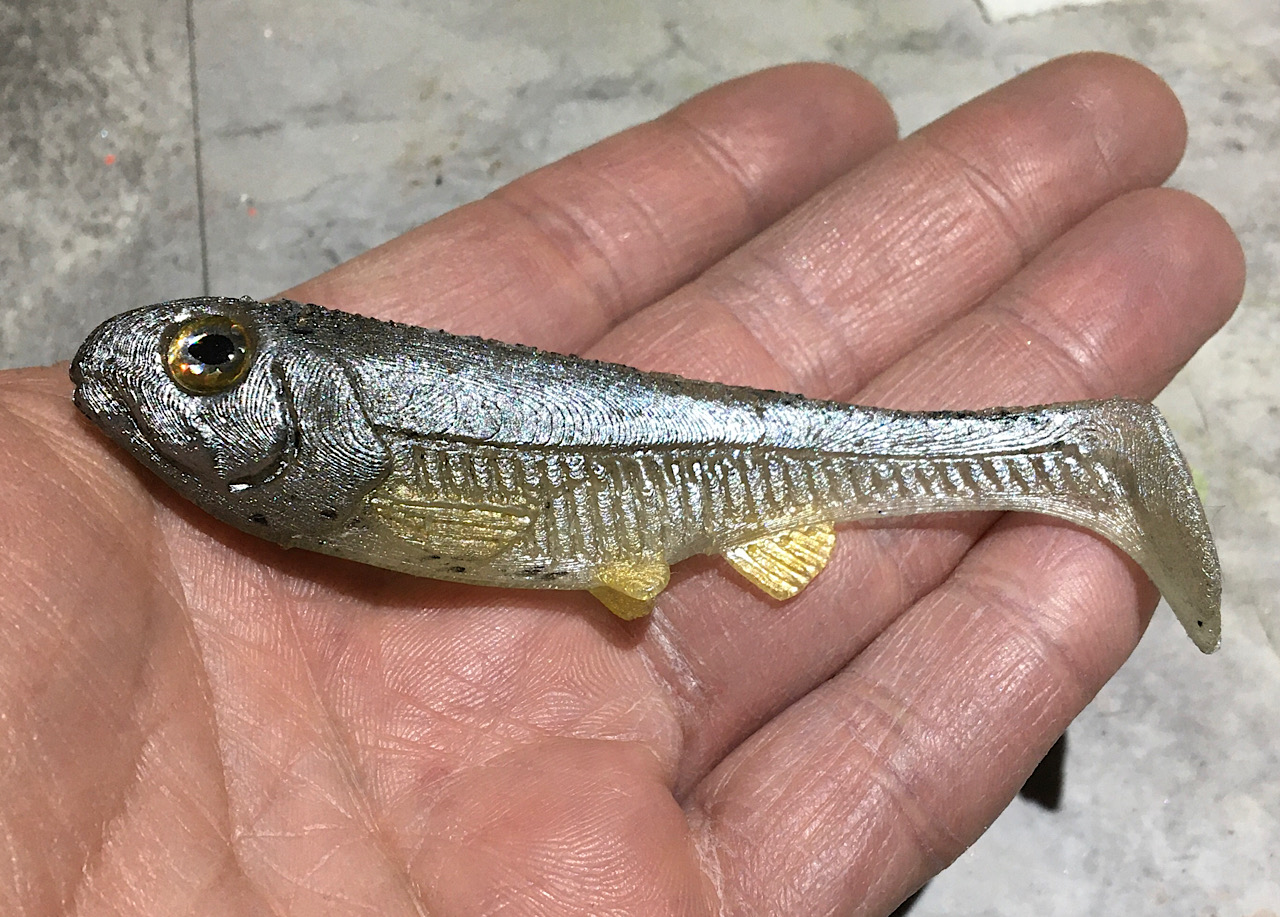
In better lighting it really has a nice natural shine to it… I can’t wait to see what it looks like in the actual sunlight.
All Information, Pictures, and Material is copyright © 2020 by Stephen Thone and may not be used for any personal or commercial purposes without the consent of the author. All rights reserved. The Author makes no guarantees or warranties as to the accuracy or completeness of, or results to be obtained from accessing and using the Information herein.
8 Replies to “Two Piece Open Pour Swimbait Mold”
Will you have this stop file for sale ? Thanks
The stl files will be available sooner or later.
stl file is available or sale?
Not yet but it’s on the top of my list of things to finish and upload.
Hey I’m gonna buy your file for the 4” to pour some bait for myself. Anyway you could do the 6” also? They look great!
I’m actually working on the 6″ design a bit (again) so it should be available in the coming weeks.
Awesome I can’t wait
very nice