Whopper Plopper
March 17, 2019
Whopper Plopper
This is a Whopper Plopper type lure that I design and 3D printed. The body length is 4 inches long so it’s somewhere in between a 75 and 110 size.

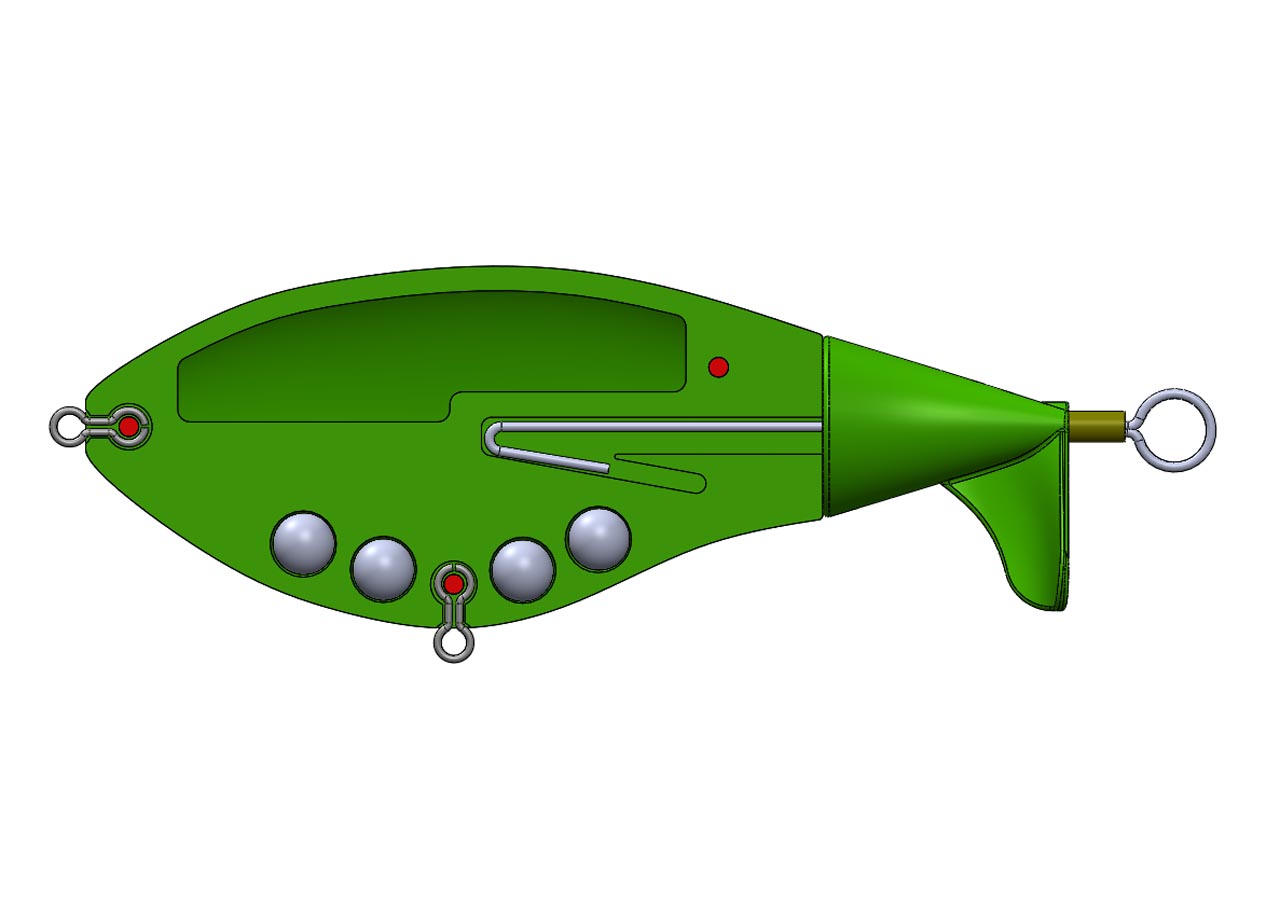
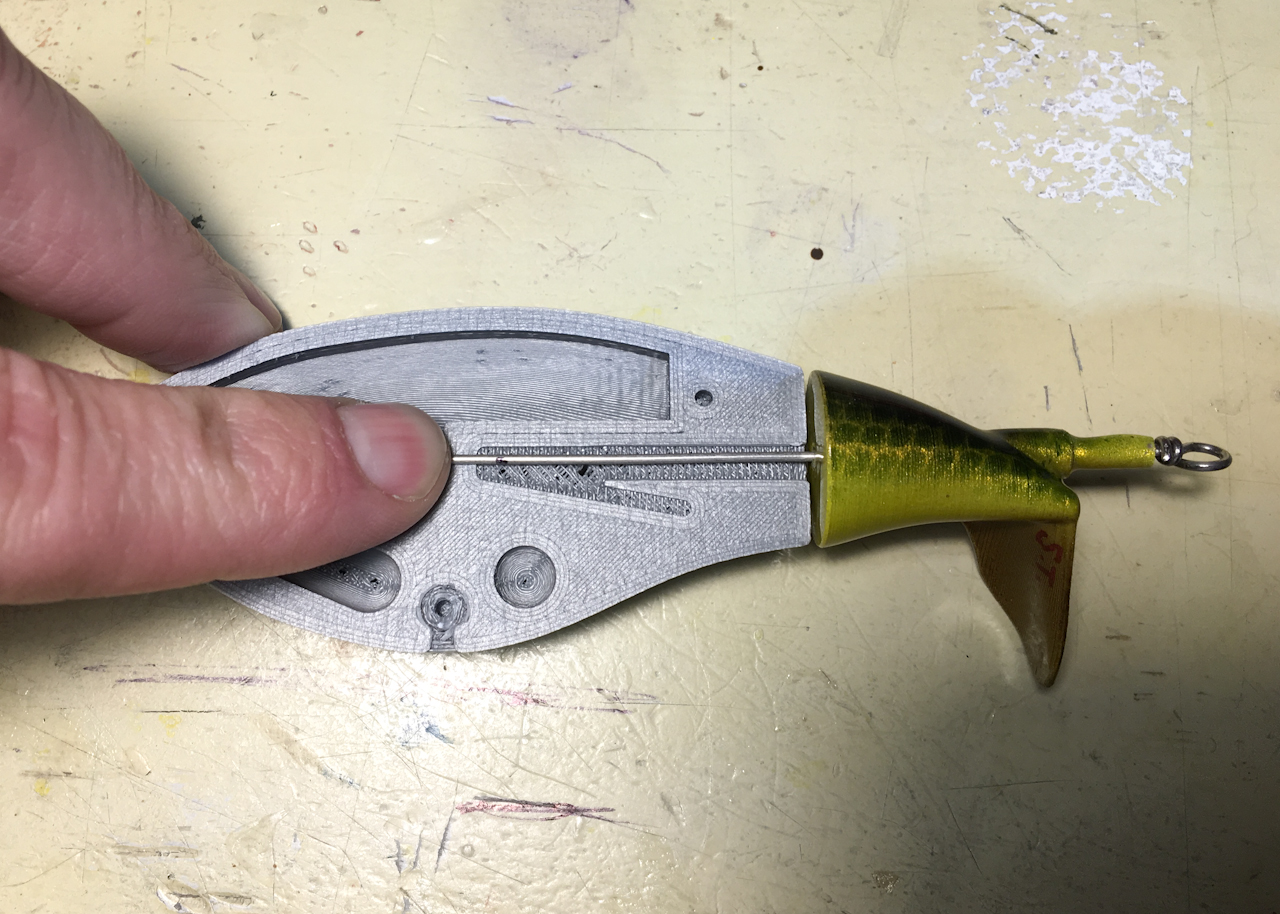
This is the initial design so far. The body is printed in halves but the tail is printed in one piece.

I wanted to be able to paint and seal the two sections separately before joining them. In theory if I bend the tail wire as shown and then apply glue to the slot and then stick the wire into the body the hook section of the wire should fall into the corresponding hooks slot in the body if the glue doesn’t hold when a fish is pulling on the rear hook. The glue should be enough but this is just an extra precaution.

I started with printing the tail just to see if it would print correctly. This thing took me longer to figure out the design in CAD than I would like to admit. I might have to reshape the tip on the tail a bit to hook more if it doesn’t “PLOP” enough but I can do that simply by heating it up a bit and bending it by hand.
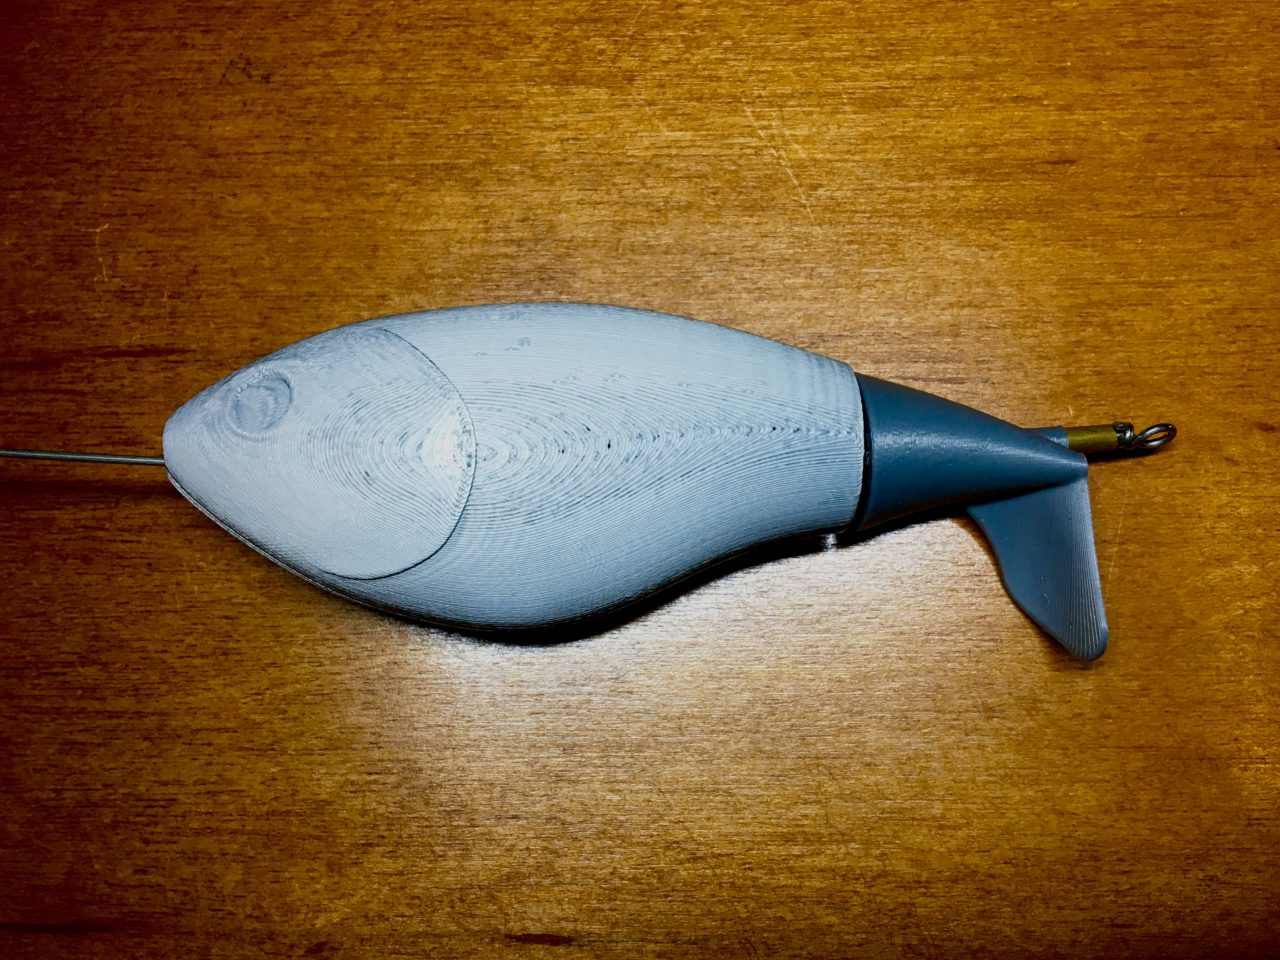
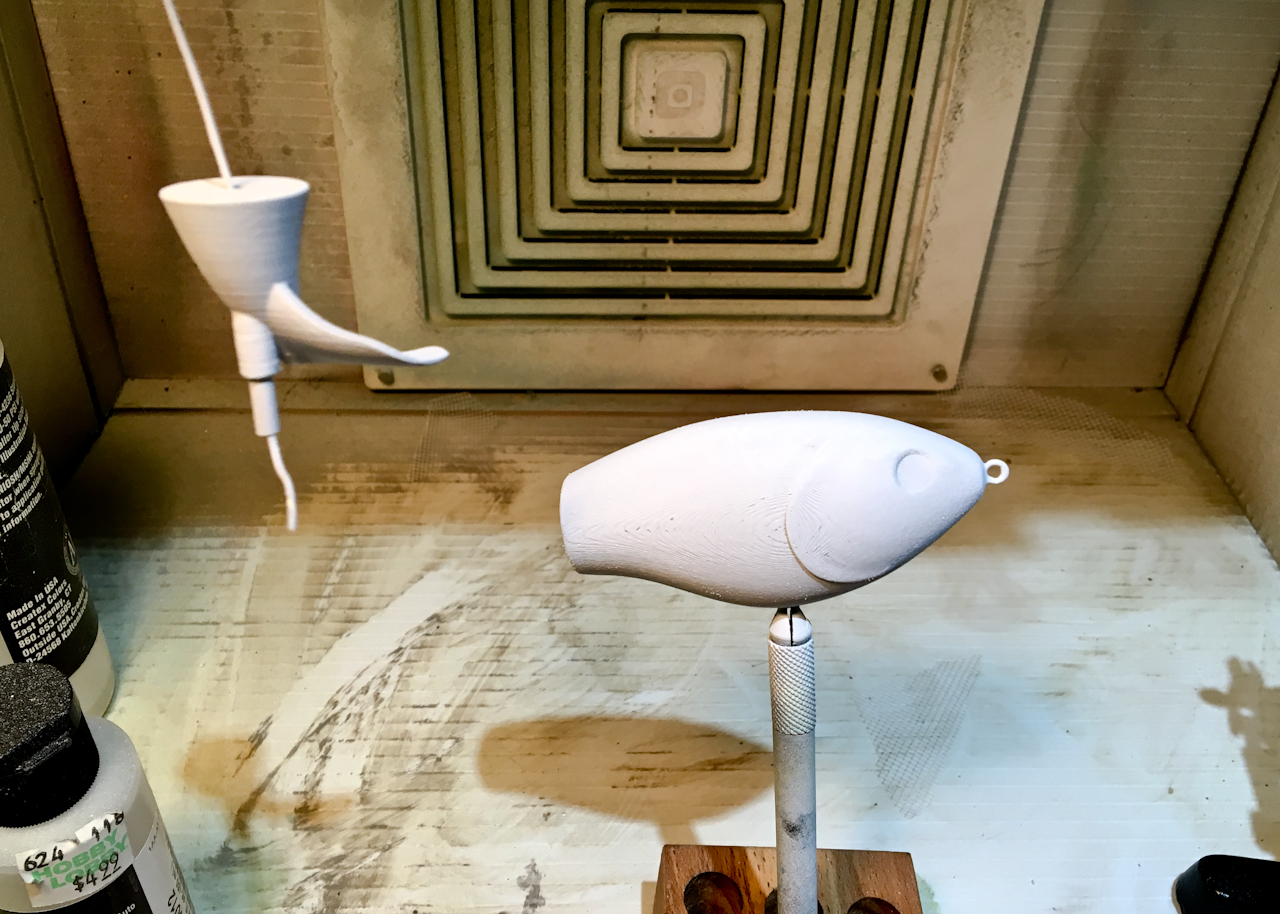
The first test body printed ok… this is just a quick mock up before float testing it to see if it while float correctly.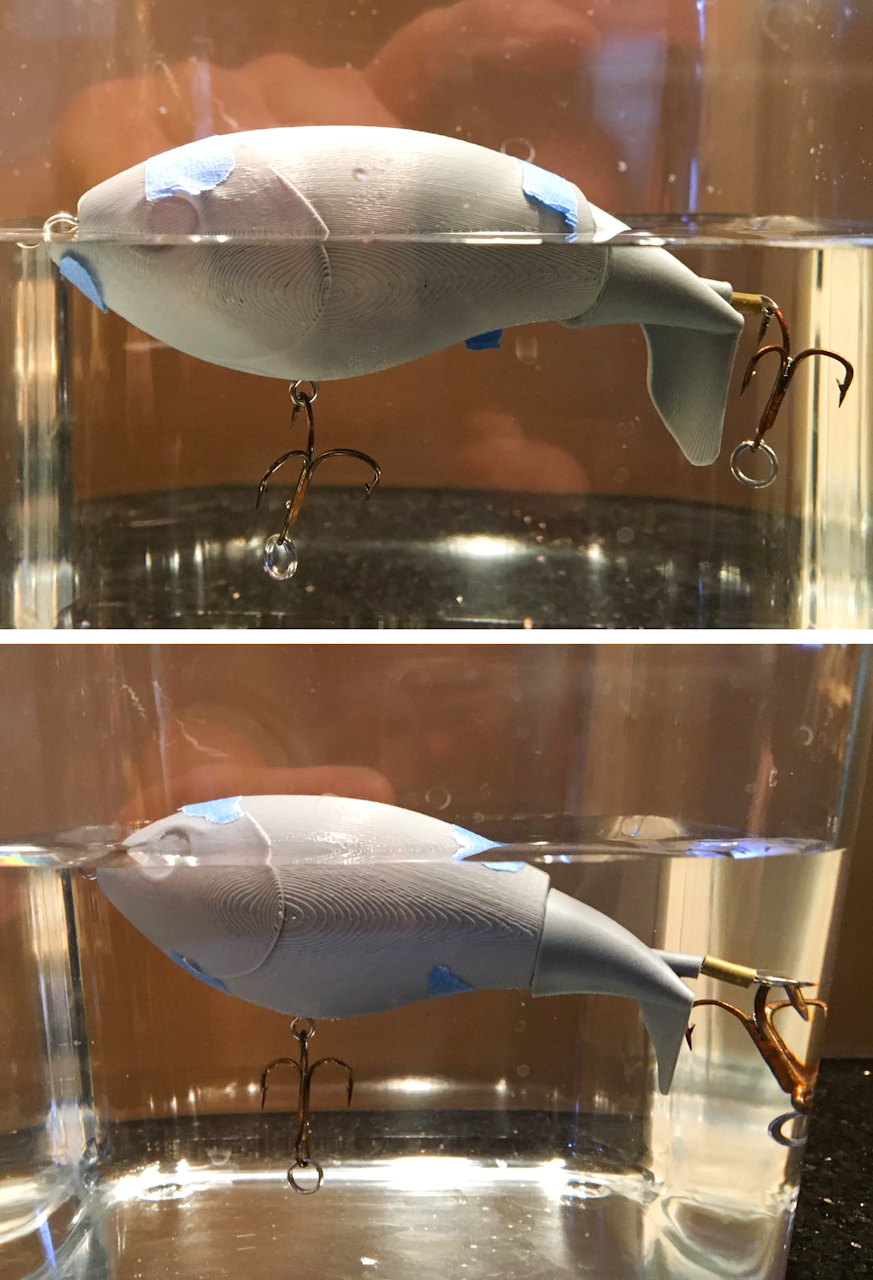
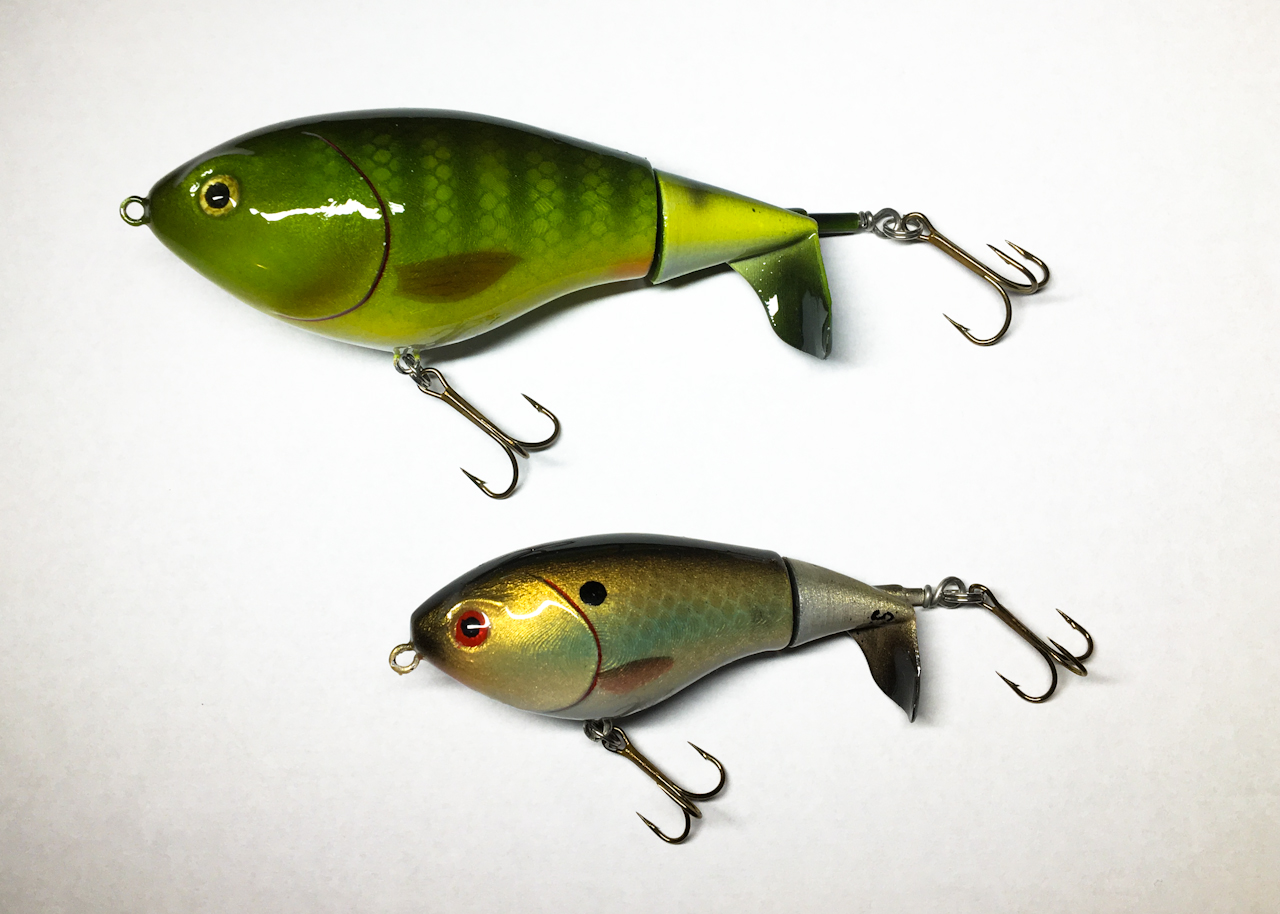
On to the float tests…. I printed the first one (top picture) at 25% infill and it looked like it sat a little high (body wise) in the water and had a tendency to roll to one side. The second one (bottom picture) I printed at 80% infill and added one more .25″ ball for weight and it seems to sit a little better and upright. I’m still not sure how its going to work though but time will tell.

I also reprinted the tail at 80% infill also and ran a 1/8″ copper tube through the entire length. This will keep the plastic from wearing out as this thing spins in the water. I also did heated the tip up for a few seconds with a lighter and bent the tip a little more to form a better prop shape.
Unfortunately I can’t really test this thing without putting it together permanently and to do that I have to paint it and seal it first so that’s where I’m at now. Hopefully after all this it is at least usable.
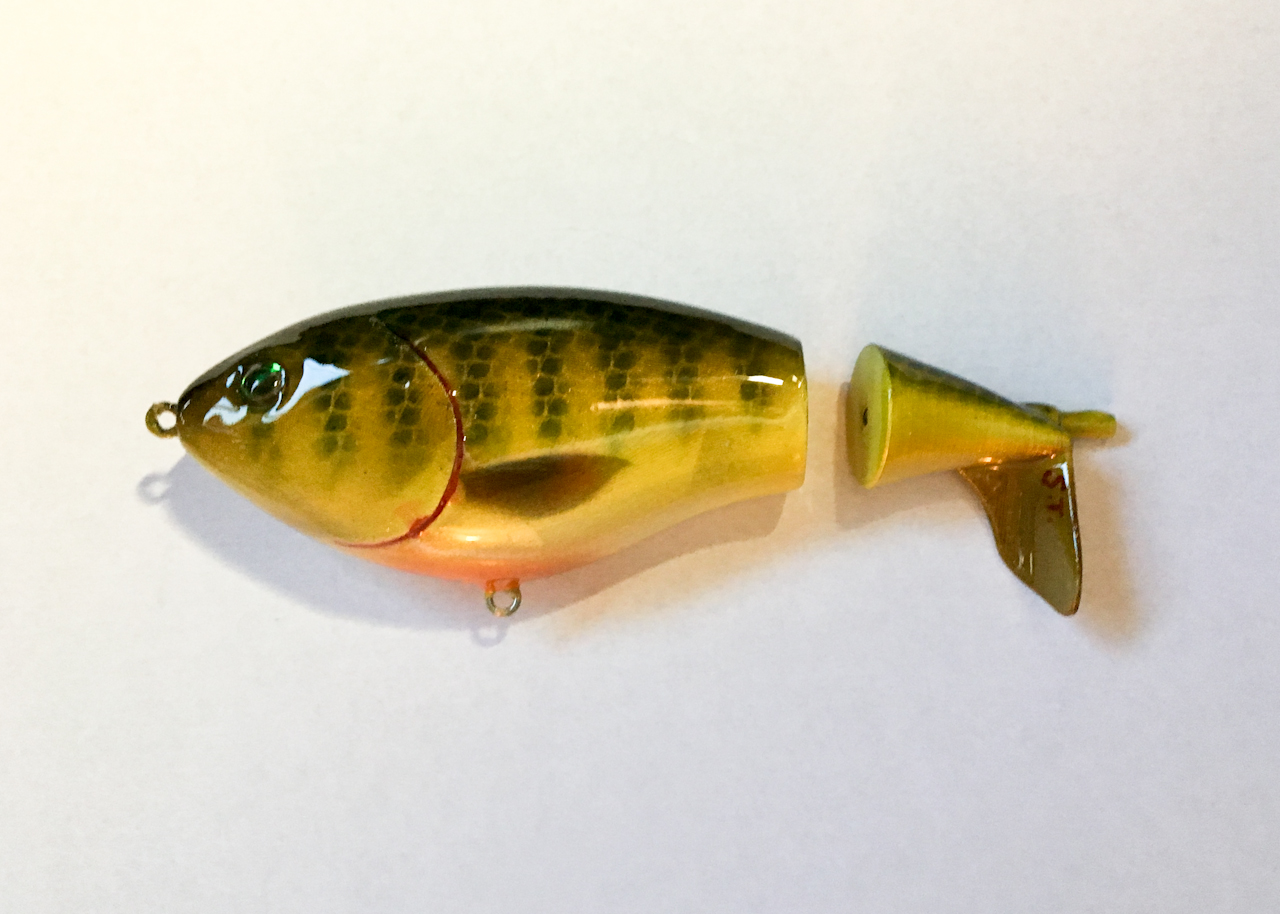
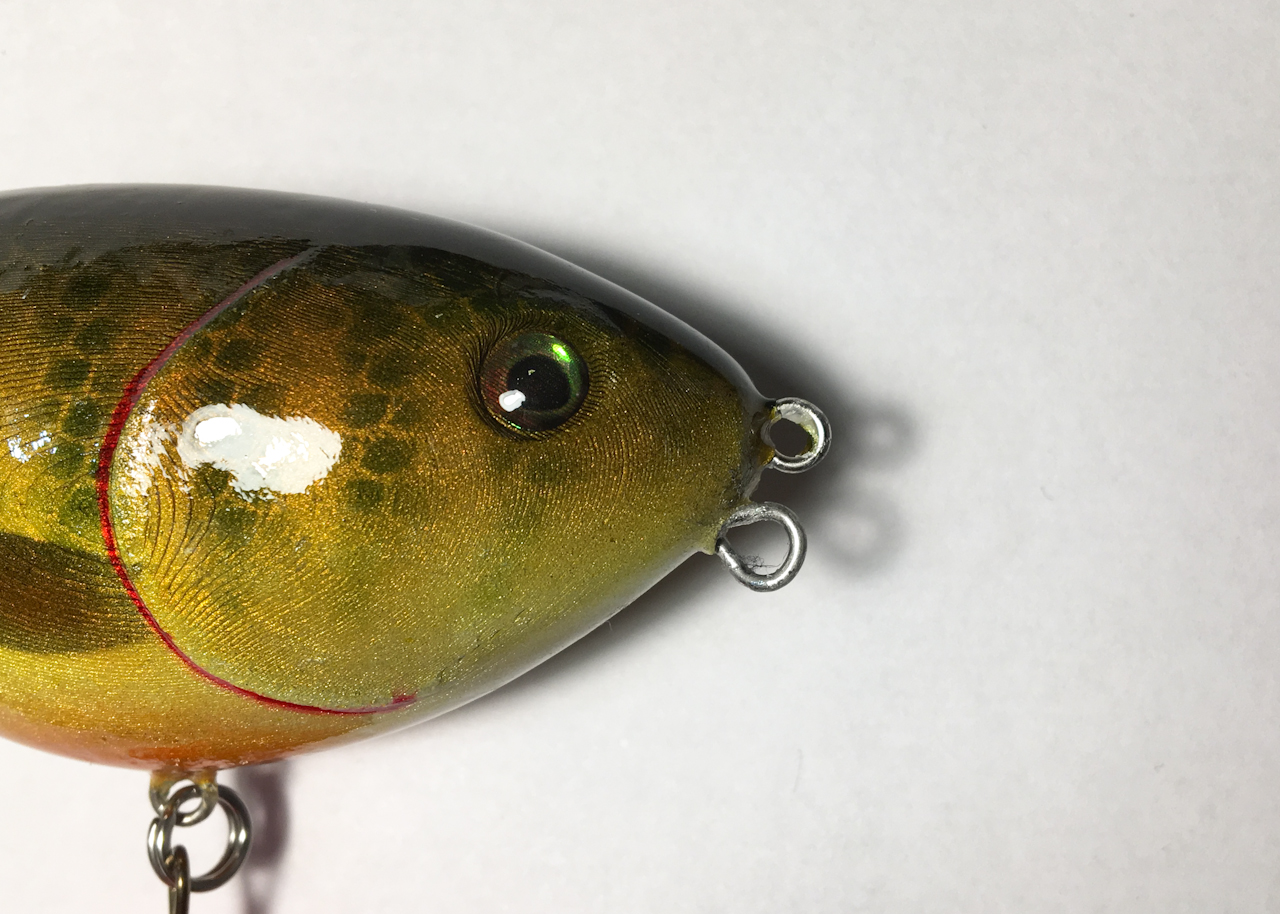
I painted it in a perch type pattern although it came out a little dark and I messed up the gills a bit but at least they look bloody so it’s all good. Now it’s time for final assembly.
I marked the wire were it needs to be bent before gluing everything together but I’m using this test print half to show where it was marked.

After putting the bend in the wire this is how it should sit in the body once glued in place.

I filled the hole with super glue and coated the wire before jamming it in the body. I used a piece of wax paper to keep the glue away from the tail while it dries and a bent piece of wire as a spacer.

It Spins!!!!!!!!!!!!!
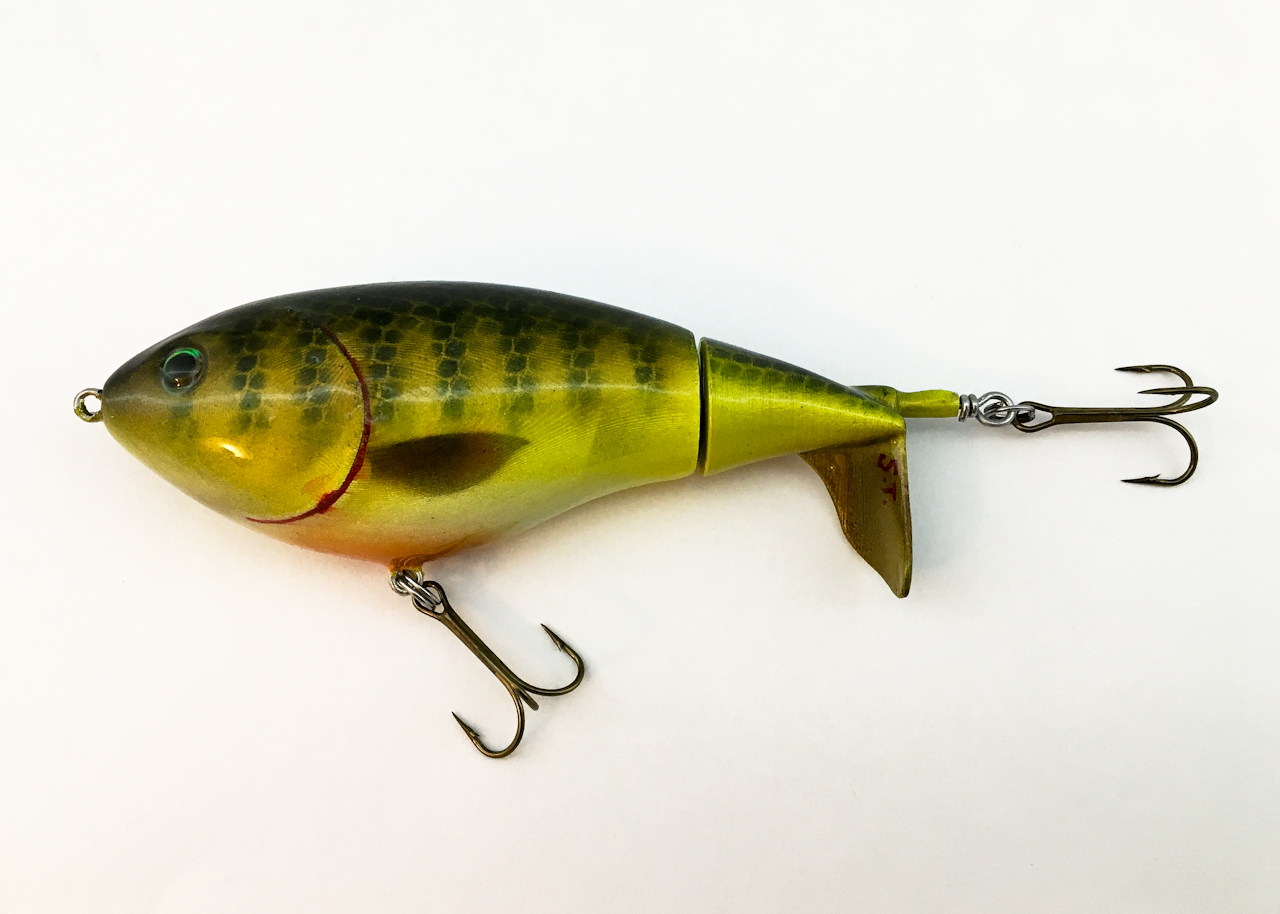
Here is the finished lure ready for testing.

I will update when I figure out if it’s going to actually work as intended.
4-10-19 = I was able to test this out the other day (I forgot to take my camera with me though) and it was a little disappointing. The lure sits in the water great but tended to swim on it’s side during the retrieve. I tried a quick fix by adding a lower tie on point in the hopes it would pick the nose up a bit on the retrieve but it really didn’t help. I guess it kind of looks like a wounded fish swimming on it’s side so it’s not a total waste but it was time for a little redesign.

The original body was very thin (width wise, more like a crankbait) so I went back and redesign the body to have a larger width so hopefully this will keep it upright now. I just have to finish this new version and go back to the testing.
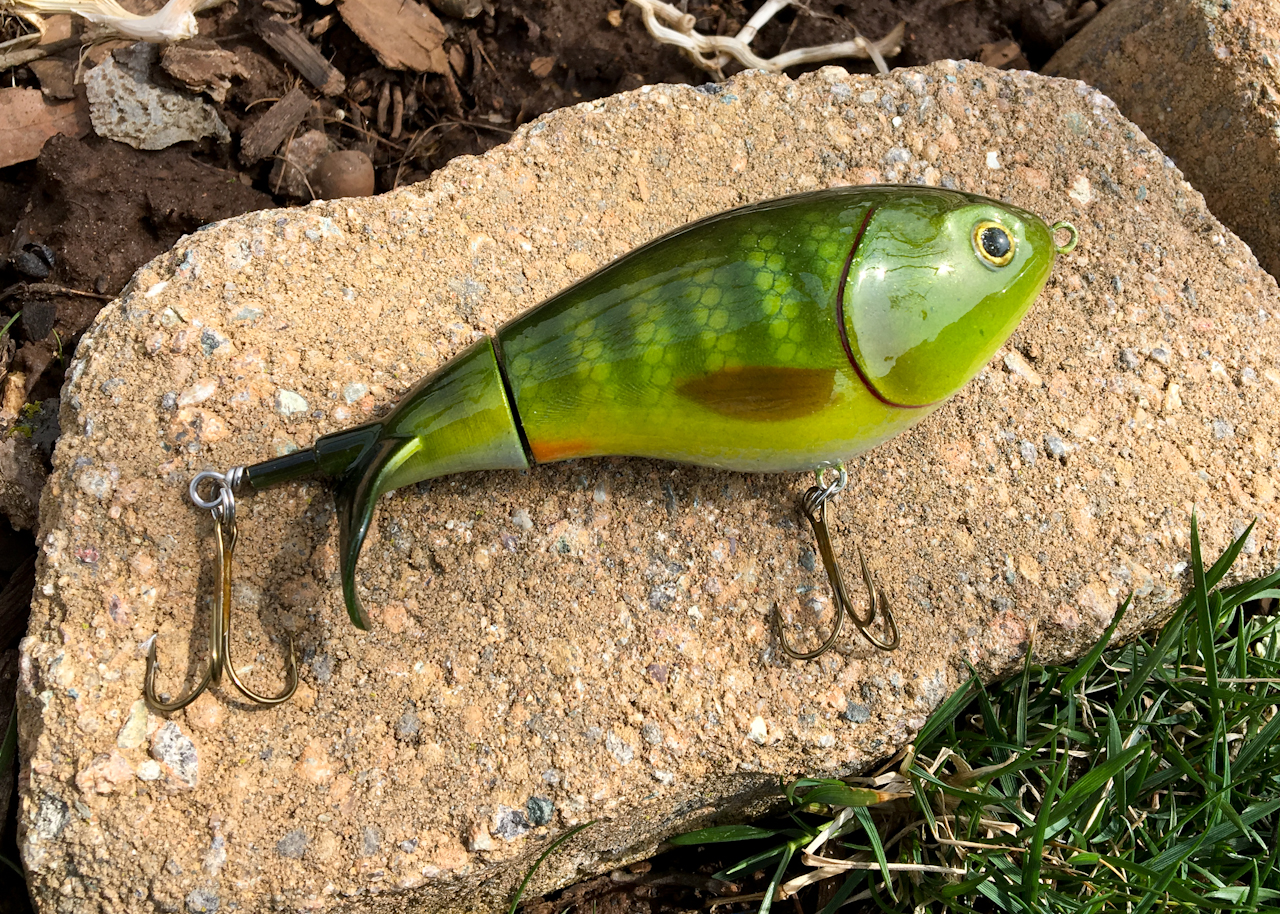
Here is the finished updated version.

A also went with the yellow perch pattern on this one too but used different shading on this one.

The wider body really helped with the swimming action. It rolls side to side a bit but it works pretty well I think. The finished lure came out a little heavy at 1.5 oz. but it casts great at that weight.
Quick crappy video of the first test but you get the idea.

Adding to the family with the Whopper Plopper Jr.
75% the size of my original Whopper Plopper.
![]()
All Information, Pictures, and Material is copyright © 2019 by Stephen Thone and may not be used for any personal or commercial purposes without the consent of the author. All rights reserved. The Author makes no guarantees or warranties as to the accuracy or completeness of, or results to be obtained from accessing and using the Information herein.
12 Replies to “Whopper Plopper”
Do you have a 3d image file or a gcode for this and the whopper version of the crankbait? I just found your site and got a 3d printer, would like to try a lot of these baits but I see they don’t all have the image or gcode files.
Thanks!
Nick
Sorry I’m not done testing them yet so I have not released them.
Do you have any updates on your design and results of any testing that you’ve done ? It looks great.
Honestly I kind of forgot about this lure but I’ll finish testing it this season. I just need to get my boat in the water still.
Have you ever considered modeling a smithwick devil’s horse? It’s originally made of wood, but plastic would work. They work great for largies and probably pike.
I haven’t thought about it but googling them it looks like it might be pretty easy to design anyway… might have to add it to the “To Do” List.
Did you finish releasing this yet?
Sorry I haven’t released it yet as I’m not totally satisfied with it.
I have been trying to work on my own, can you give any tips or guidance. I understand you still aren’t ready to release yours so there must be something holding it back. The ones I’ve tried all barrel roll regardless of what I’ve tried to keep them upright. Anyway, your work is unbelievable, so many awesome things you’ve done. I am going to have a ton of projects just based on what you have on this site.
Yeah I haven’t gotten this one perfect yet. Mine tended to roll on their side a little to much for my liking (but they still worked ok) I think I ended up adding weight to try to get it to swim correctly but if I recall that made it sit a little low in the water and didn’t fix the roll completely and required me to hold my rod tip up high to make a good PLOP. I thought about adding a little fin on an angle to the bottom of it to counteract the torque roll I just haven’t found the time to try it yet.
I know I asked you about the tail spinner but I’m interested in this one as well. Did you make it any farther with the tumbling/rolling?
I’m still working on this one but haven’t been able to work on it in awhile. (I still haven’t set up my shop after moving 6 months ago.)