Custom Jig Heads
July 28, 2020

Custom Jig Heads
STL’s for this lure are available for purchase from Cults3d.com
These are custom made lead Jig Heads. I learned to make these using this process show below from Elliott at Revamped Outdoors (Check him out on YouTube and Instagram). This process first involves designing a custom mold box in CAD which is then 3D printed. Once printed a master mold is cast in high temp silicone which the lead is then poured into to make the actual jig heads.

For my first design I am just trying a basic Ned Rig jig head. This one is based off a size 2 Mustad hook. This is the basic design of the head and relief for the hook and keeper.

Once the basic design is done a funnel is added. This is where the lead will be poured into the mold.
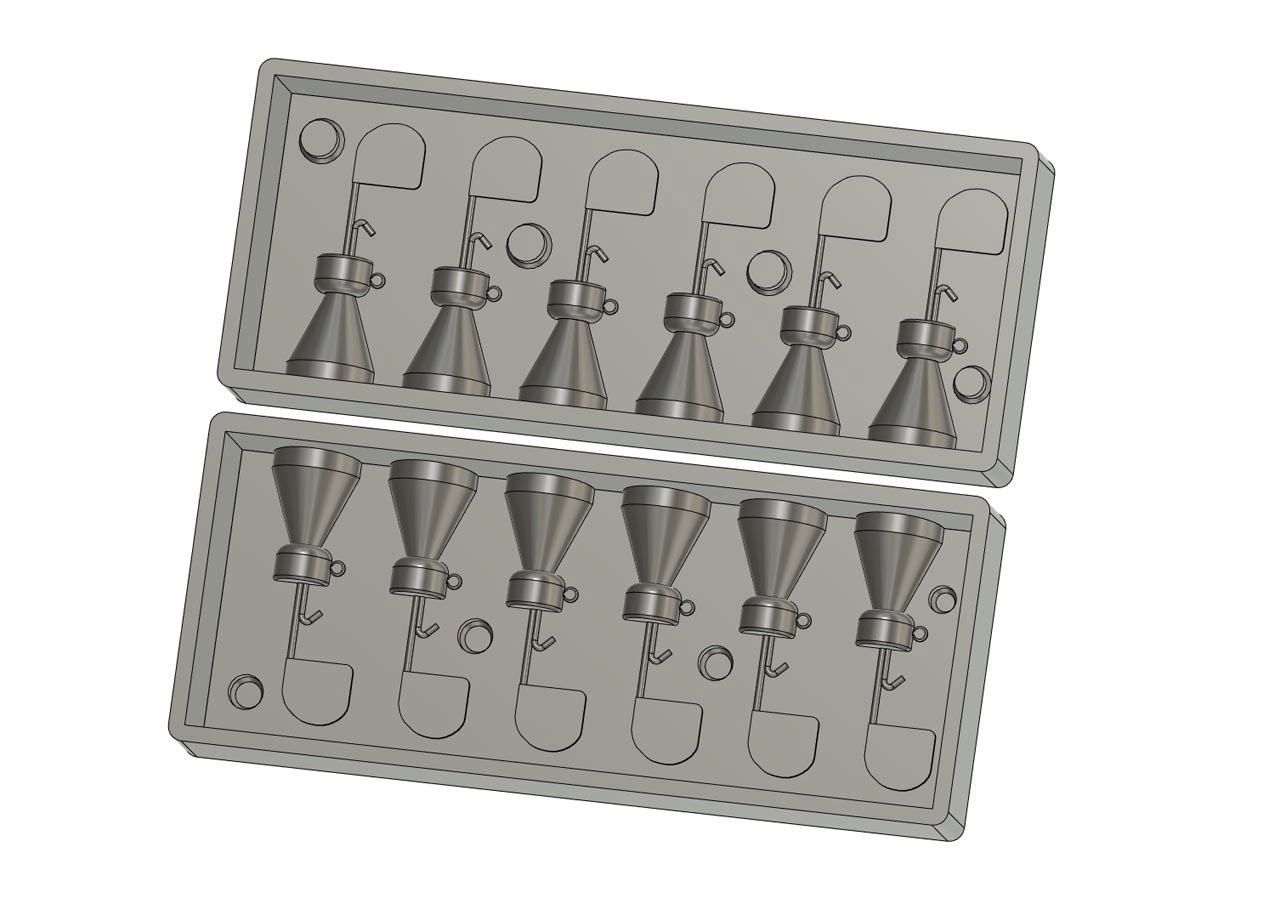
Then it’s just a matter for designing a mold box around the jig head layout. I went with a six cavity mold box.

Then the design is 3D printed, I printed this in PLA with a .10 layer height.

Mold Max 60 silicone is then mixed up and poured into the mold and left to cure for 24 hours.
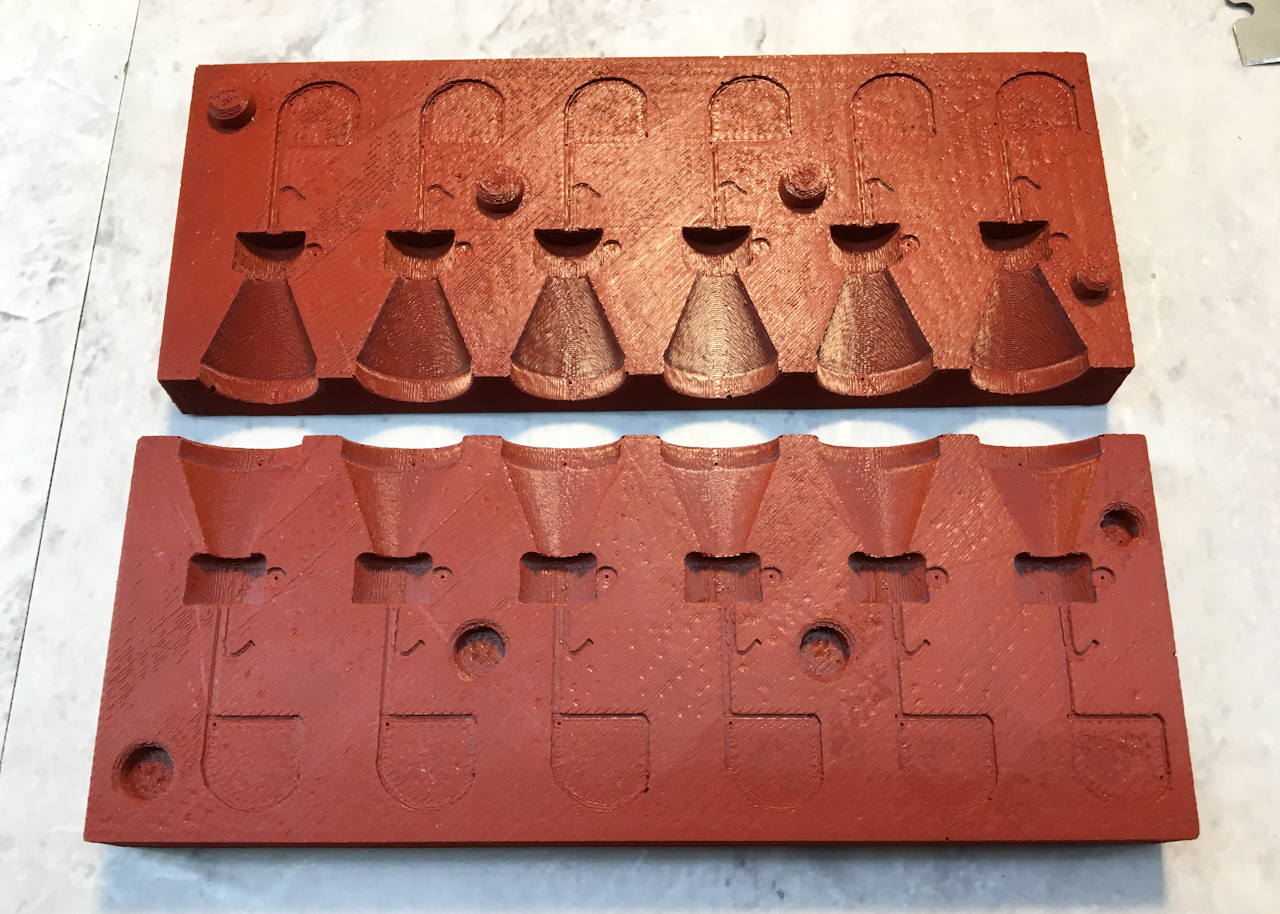
Here is the finished master mold ready for action.

Next it’s a simple process of just laying in the hooks and keepers. (the keepers were just bent from .031 safety wire.)

After that I just lightly clamped the mold halves together.

While it’s not recommended… for testing I am just using old lead tire weights. (I have some pure soft lead coming that should work better.)

Here I am just using an old razor blade to scrap off any slag from the melted lead.

Pouring the lead is pretty simple will this melting pot…. no ladle is necessary you just pour right from the pot.

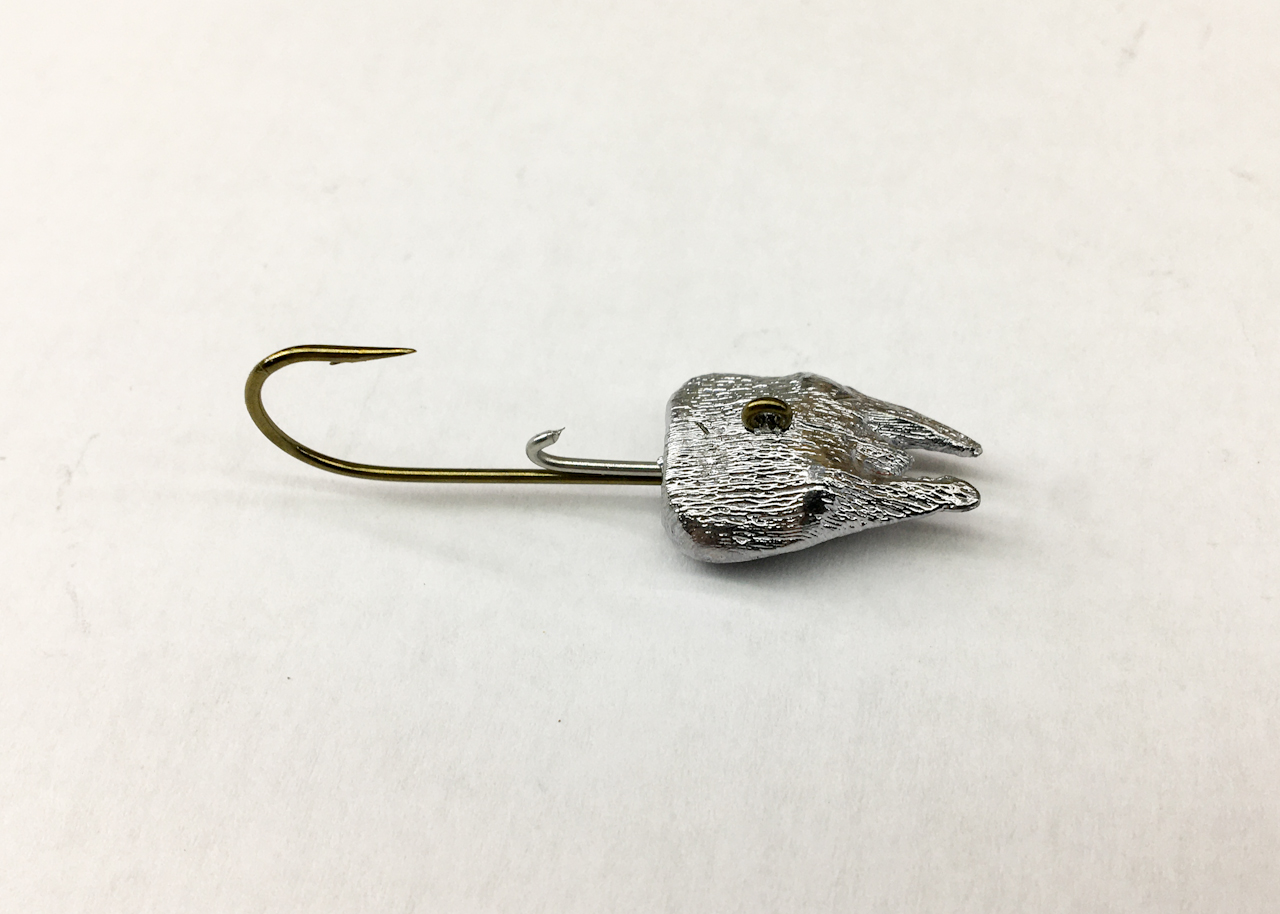
Here is the reveal of the first batch of poured jig heads.

Overall they came out pretty well for a first try.

Now it was just a matter of using a hobby saw to trim off the spout.

A little work with a file or sandpaper and the face of the heads are cleaned up.

They are not perfect but I’ll have to see if the pure lead will work better but overall they a good enough for me.

I poured two batches for now…. I want to test them out before I get to crazy.

To finishes them off I powered coated them using the Harbor Freight powder paint method. The finished weight on these is about 5 grams or so right around 3/16 of an oz.

I tried to sprinkle on some glitter too. I still need to bake these for a bit but they should work great. With a little more practice they should get better.

I also painted a few of them after powder coating them white.

Design #2 is an ultralight swimbait jig head.

The design process was done the same way.

Here is the silicone mold for the swimbait. (I used the wrong print settings but it should still work.)

Overall it worked although the details get lost on something this small. (I’ll try again with the new lead to see if they improve.) The finished weight on these were 4.23 grams so they are around an 1/8 ounce.

I used a little paint and some UV resin for the eyes and the keepers on these are actually made from staples. (We’ll have to see if the both hold up.)

Here are the bodies a designed around the jig head. (the whole bait is about 2 inches)

Design #3 is a custom head for the Hellgrammites I made before.

I only went with a 3 cavity for this design because I have my doubts it would work.

The mandibles of the design have an undercut and are above the spout gate so this will probably cause some pouring issues.

The mold box printed fine…

… and the master mold came out well despite the mandibles tearing the mold a bit on removal.

As suspected getting the details of the mandibles to come out proved to be challenging. Only two of the 6 attempts worked out. I have to figure out how to vent the silicone mold a bit. Even the bad ones still look good enough for me though. (I probably should have put the spout on the other side so the mandibles pointed down… live and learn I guess.)
This is the best one of the bunch so far. Again I’m hoping once I get the new lead things will work out better. These weight in at about 6.48 grams so just under 1/4 of an ounce (if I did the math right.)

A little paint to match the plastic and a clear coat of UV resin….

… and this is the finished bait. This one is my favorite so far… now I just need to get out and test them.

Updated 10-24-20 = I ended up redesigning this mold so the mandibles tips are down so it would fill better when poured.

Ready for the first pour.

Overall they came out much better with this mold.

I kind of have to tear the mold a bit when removing them from the master blank because of the under cut, normally this squeezes back together with out any issues…

… but unfortunately I pulled this half out of the mold the wrong way and ripped this side pretty bad. I was able to super glue the pieces back in but they didn’t hold up after a few pours.

I was still able to get a bunch of good ones. These just need cleaning up and some paint and they will be ready to fish. I will probably just remold that one side if I need more.

Next up is going to be a Crayfish Tail Jig Head for the Soft Crayfish bait I made awhile ago.

This is just going to be a single cavity mold as I really don’t need a ton of these.

Using the correct print setting this time the tail mold printed a lot better.

The finished master mold came out great.

This first test pours came out great also.

A little paint and cleat coat to finish them up.

The paint isn’t a perfect match to the plastic but close enough for me. Now I just have to test them.

This one is a little more basic but it’s just a quickie design to test a stand up jig head.

Here are the first batch ready for testing. I didn’t get to fancy with the finishes I want to make sure they are going to work as expected first.

Initial tank testing looks promising.
All Information, Pictures, and Material is copyright © 2020 by Stephen Thone and may not be used for any personal or commercial purposes without the consent of the author. All rights reserved. The Author makes no guarantees or warranties as to the accuracy or completeness of, or results to be obtained from accessing and using the Information herein.
8 Replies to “Custom Jig Heads”
Hey man i just started making lure molds for soft plastics and wanted to get into making jig heads. What cad software are you using to make your jigheads? i currently use 3d builder the free software that comes with windows but does not have accurate measurement parameters so i have to do everything by eye which could make making jig head molds difficult to fit the hook measurements. Any and all information is greatly appreciated, thanks!
I’ve been using Fusion360 for most of my stuff lately. It’s free but they have been limiting some features recently but it’s still worth looking into.
Hello! Didn’t you accidentally share the 3d models somewhere? It would be a great help if I didn’t have to design, just print 🙂
The stuff I have shared is available on cults3d for sale. https://cults3d.com/en/users/sthone/creations
Can you customize jighead for 2g-10g jighead i have my design of jighead and how much it coast thank you
Sorry unfortunately I don’t have time to do custom work right now.
hello, your work is very amazing. i use only 10 and 15gr if sometime you have that or do that don’t hesitate to say me 😉
David
Sorry I do not have anything that size.