Photo Finish Technique
December 17, 2018
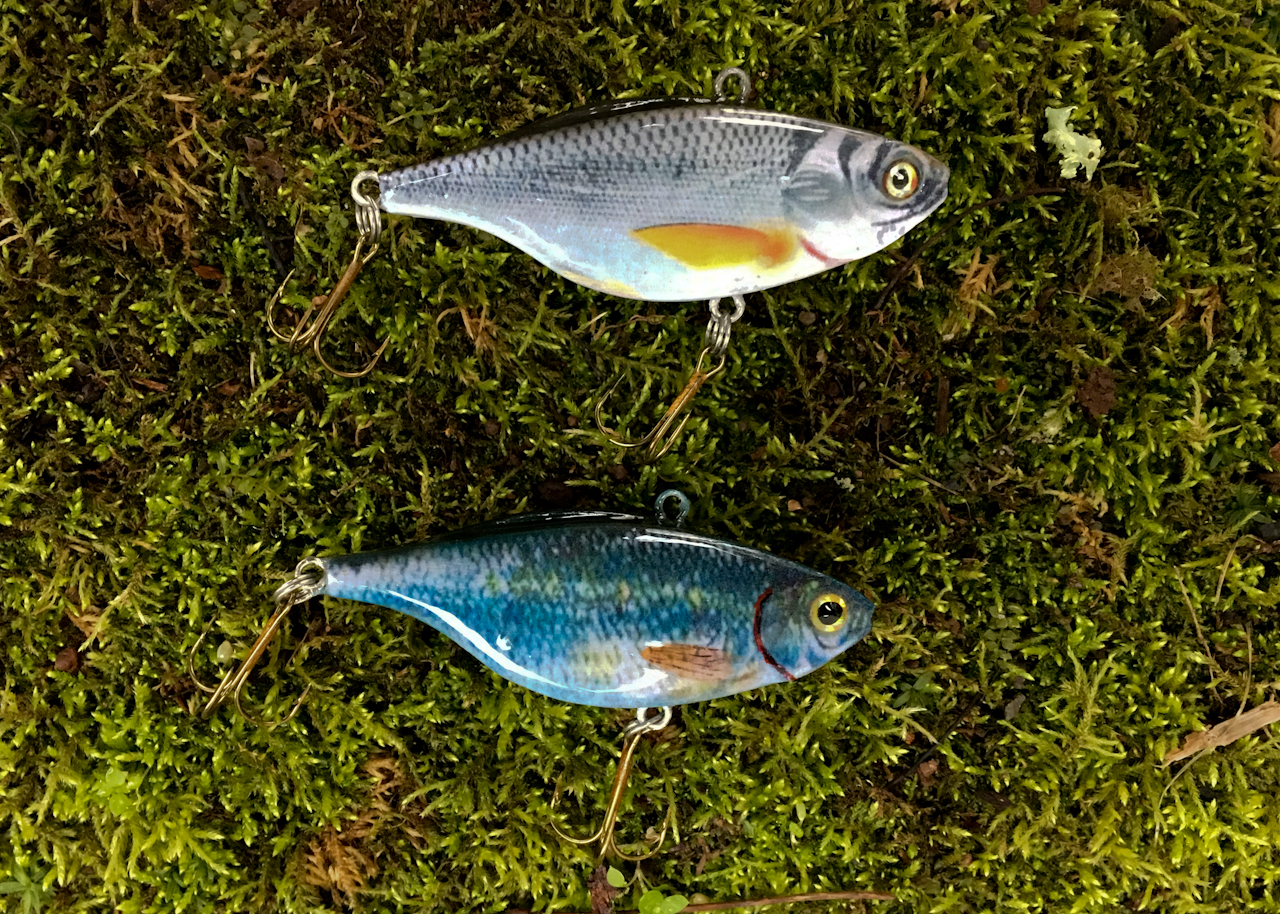
Photo Finishing Technique
This is a quick technique for adding photo finishes to lures. I’m sure there are better ways to do this with things like decal paper but this is just one method I’m trying with products I had on hand or that were readily available. This is not meant as a full blown tutorial but just a quick run down on how I did things.

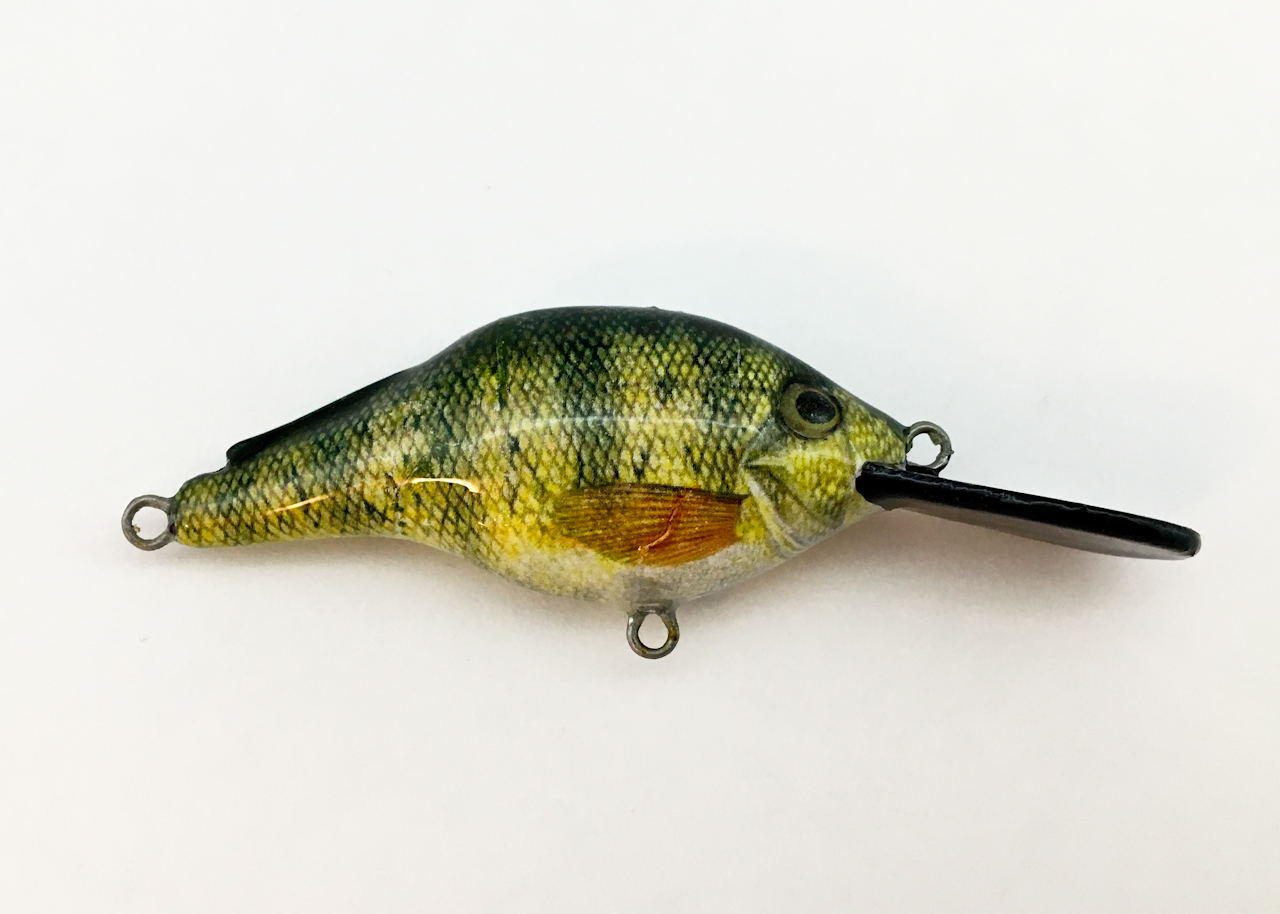
I’m am starting with a cleaned up (no details) version of my 3d Printed Lipless Crankbait. (mainly because it has flat sides and will be easier to work with for the first test of this process.)

I started by grabbing a few images off Google and opening them in Photoshop. (One was of an actual fish and the other was of a lure that had pattern I liked.) I start with a canvas the same size of my paper (8.5 x 11″ in my case.) and I then import a picture of my actual lure design and scale it to actual size. (2.8 inches for the Lipless crank.)

Using the Free Transform feature in Photoshop I size and skew the image until its the slightly large than my lure. Skewing the photo will mess with the photo quality a bit though which is way I also choose a lure picture too so I wouldn’t need to skew that one.)

I can add few different ones on the page before printing just to have a few to play with encase I screw them up cutting them out. I probably could have fit at least 6 but I only did 3 for now for testing.

I printed them out on plain paper using an inkjet printer and then cut out the basic shape using the actual lure as a guide.

I also tried printing them out on glossy photo paper and while they look a lot better in terms of quality I think the paper is going to be too thick to work with so I’m sticking with the plain paper version for now.

Laying the cutout over the lure and using my fingers I then shaped the paper to the form of the lure.

Here you can see how the paper has now taking the shape of the lure. This is pretty easy on this lure because of the flat sides. If the lure has a lot of curve to it the paper may form wrinkles or tear and just be harder to work with.

One last test fit to trim off any excess before I adhere them to the lure.

I will be using something called Mod Podge to glue the paper to the lure blank. Mod Podge is a craft product that is a glue/sealer/finish all in one product and can be found at most stores that sell craft stuff. (like Walmart)

I apply a thin coat to both the lure body and the back side of the paper.

I then stick the paper to the lure and after aligning it in the correct spot I use my fingers to smooth out the paper until its formed against the lure body and there are no bubbles or wrinkles.

I will be using stick on eyes so I also make sure the eye sockets are indented too. Once both sides are done I leave everything to dry for about 15 minutes.

Once dry I come back and put another thin coat of the Mod Podge over the entire lure to seal it before painting. The sealer is wet here but even when dry it did leave some streaks because I used a cheap brush. Once the final sealing is done you will not see these though.

Next it’s on to paint to blend the lure body to the picture. The bottom just gets a little white airbrushed on to it. (As you can see the seams of the paper do show but they are not that bad and I don’t think the fish will care.)

The top of the lure had a lite coat of white for starters…

… and then I finished with some transparent black to match the picture.

The stick on eyes where then added which really adds to the realism.

Mod Podge is water based so the lure still needs a final seal. I normally use Envirotex lite epoxy for sealing but some people swear by this stuff so I thought I would try it. It’s a lot thicker to work with (I guess I should have thinned it first) but it dries faster the the Envirotex stuff. (You really need to make sure these are sealed well because if any water gets under the clear coat it will definitely ruin the paper photo.)

After sealing it’s on to the spinner rack for a few hours.

The finished lure came out great. I’m not sure how they will hold up over time but they are sealed so I think they should be good.

Here is the one with the picture of the real fish. The image is a little distorted from skewing it but it still came out great. I did add a few details like the gills and pectoral fins.

The bottom was blended almost perfect with the pictures using the airbrush with a little white, blue, and black paints. I tried to cut the seams closer to the edges on this one so they wouldn’t show as much.

The top was done the same. Overall I think it is an easy process that makes for a great looking lure. It’s almost hard to tell these are 3D printed at this point. Now that I know this works I have to find some better images to work with for the next ones.

Fish ON!…. its a little dink but they like the finish anyway.

I also tried to do one of my Crankbaits. This one is more challenging because of the curves and I want to try and do a full wrap on it. I start with a rough cut out of the template to be made.

Next I drew a line down the center of the bait where each side of the wrap will meet.

I center the rough cut template and mark the centers of the tail and lip to help me keep it in place.

After that I start to bend the paper toward the center line on the top and bottom and mark these locations at various points around the template. After many rechecks and trimming (not shown) I finish trimming the template to the final shape.

Once the template is finished I lay it on a piece of paper and mark a known distance (3 inches in this case) so when take a picture of it and then import it into Photoshop I can scale it to actual size.

Using a picture of a real fish again I scale and skew the image in Photoshop (not shown again) until it fits the template.

This is the finished image I then printed out.

After gluing on the printed images I did have a bit of a gap on the top as the template wasn’t perfect but good enough for the first try.

The bottom was a lot better but still not perfect. Next time I’ll just make the template bigger and trim it on the lure maybe.

I just mixed up some paint and touched up the gap by hand with a brush.

Same on the bottom.

There were a few wrinkles in the paper after applying it but it still looks good to me.

I also airbrushed a little orange on the bottom and added some more fin details.

After sealing with epoxy this was the finished lure. There was a few flaws with the template and the wrinkles in the paper but it came out well enough for me. I’ll have to try to redo the template on the next one.
I also did one in a Yellow Perch pattern…

… and in a Crappie pattern too.
![]()
All Information, Pictures, and Material is copyright © 2018 by Stephen Thone and may not be used for any personal or commercial purposes without the consent of the author. All rights reserved. The Author makes no guarantees or warranties as to the accuracy or completeness of, or results to be obtained from accessing and using the Information herein.